Tuesday, December 19, 2017

Finally, I got to see the Cheetahs!

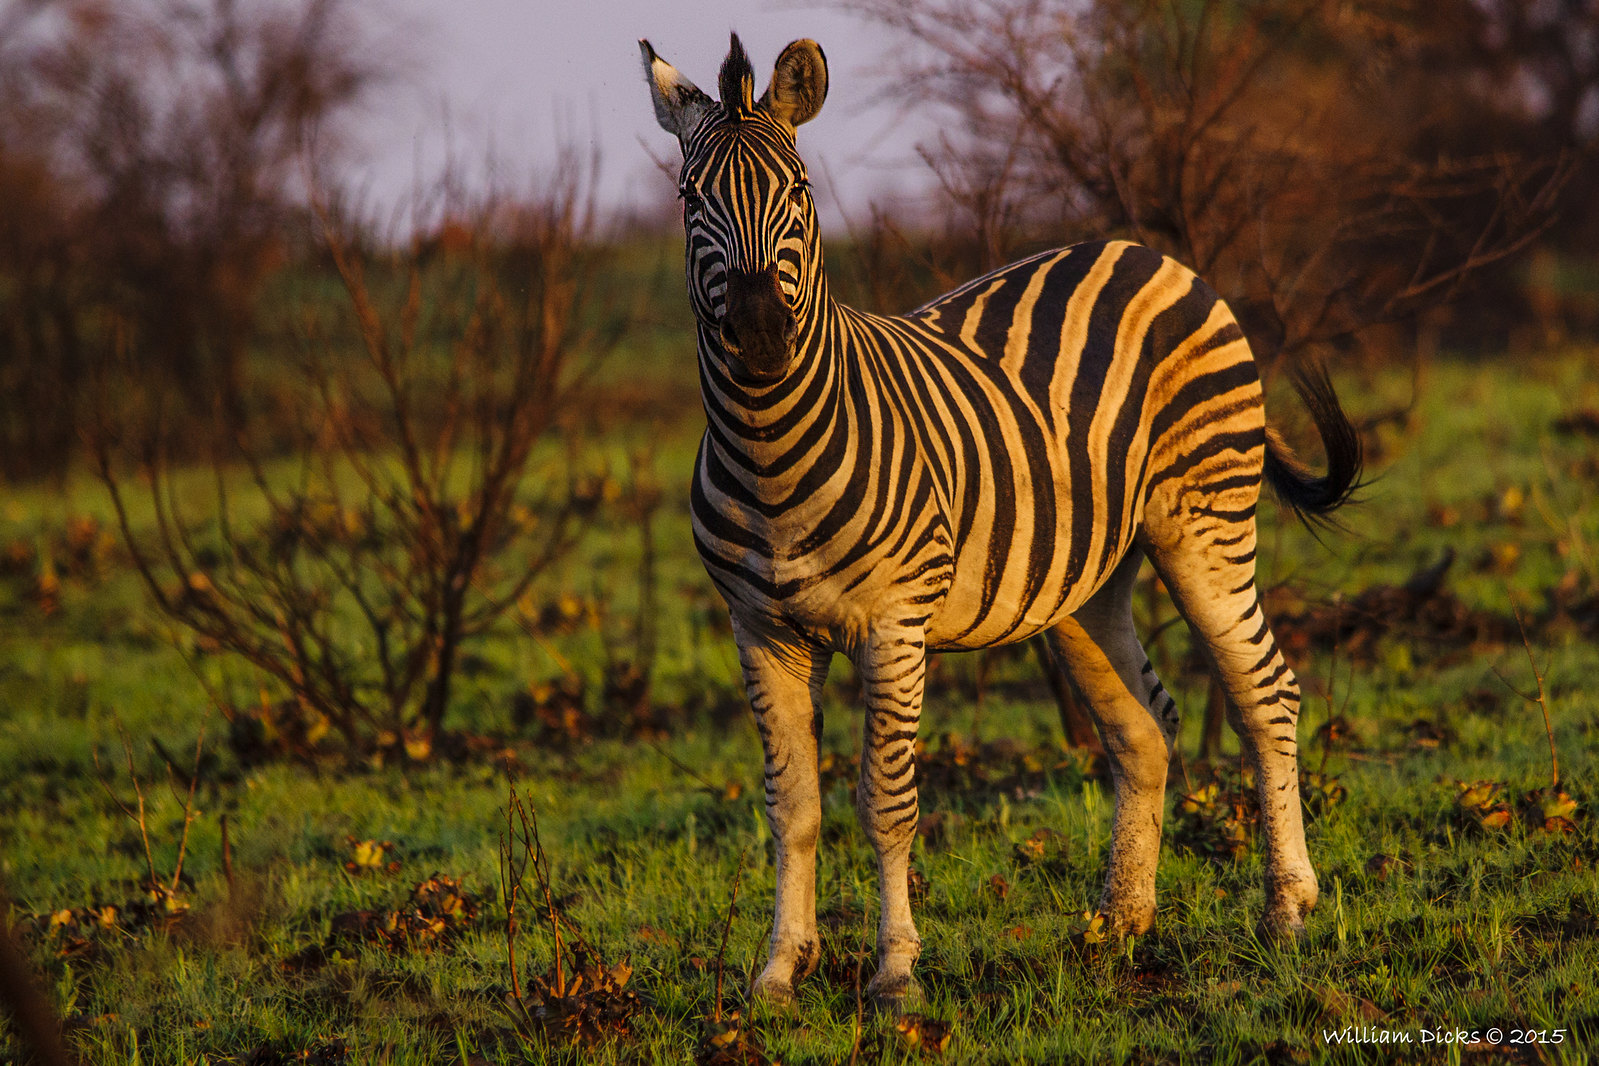
I arrived at Rietvlei Nature Reserve just after 06:00 on 16 December 2017, and it started like most of these visits do…, seeing zebra.

The Three Stooges, uhm, zebras!
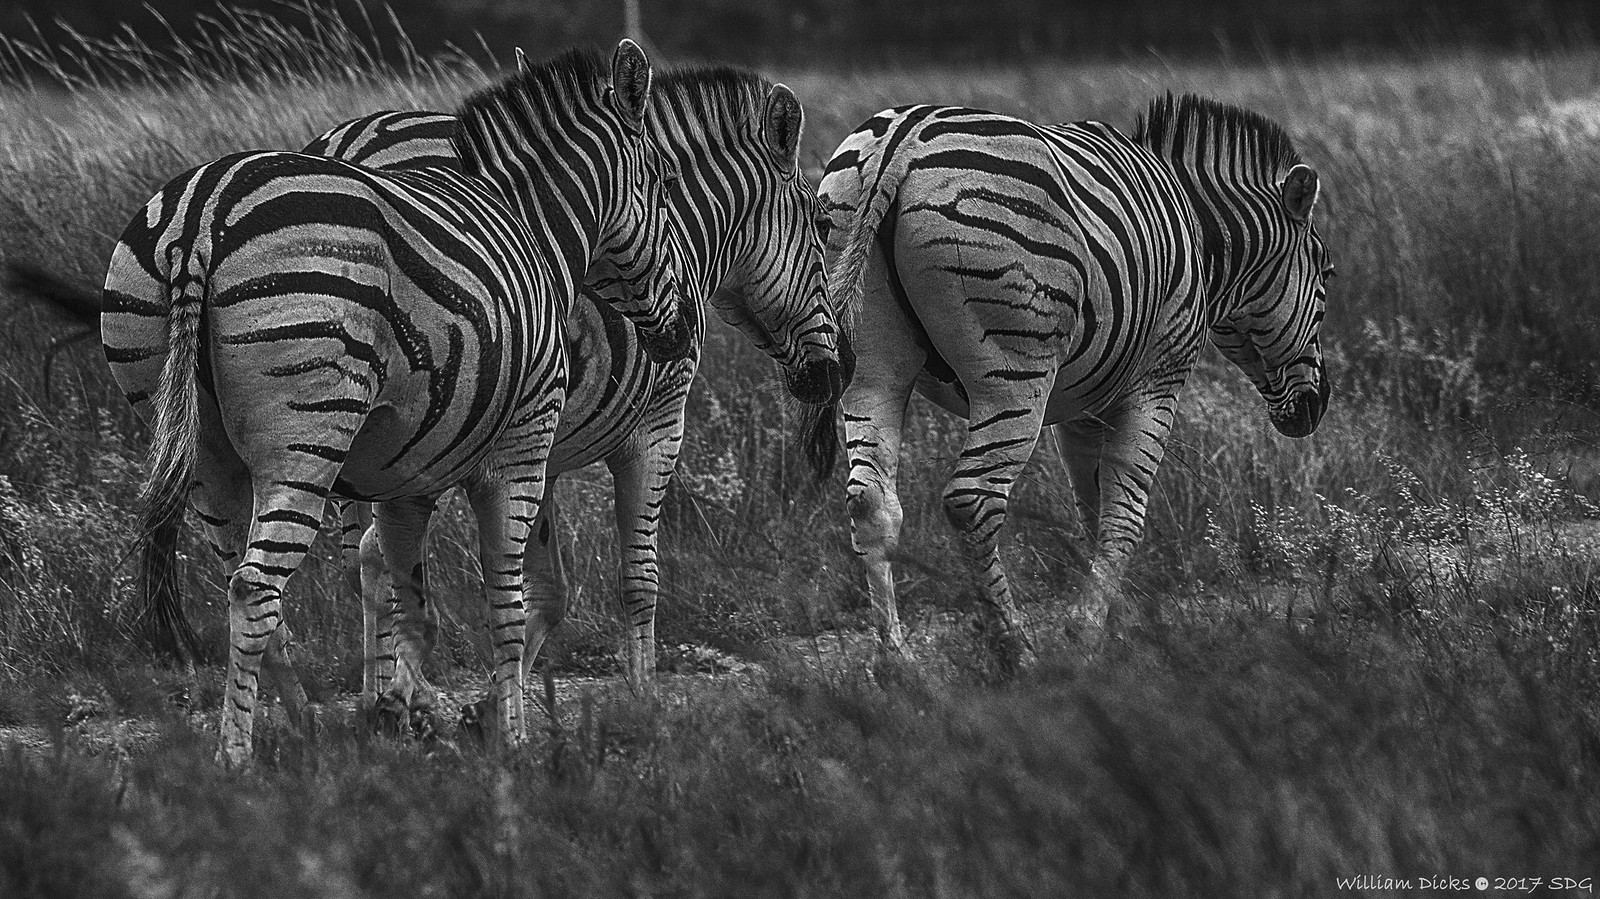
Three zebras moseying along!

I have been visiting Rietvlei Nature Reserve for many years, and several years ago, Cheetahs were reintroduced to the reserve. Since then I have been hoping that I would be able to spot them. I only once got to see them, and it was very fleeting. I am on the Rietvlei Photographers WhatsApp group, and I started receiving many messages that the cats had been spotted. I made my way over and eventually got to see them. Since that time I had been hoping that I would get to find the cats by myself. That opportunity finally presented itself.

Cheetah mom and cubs

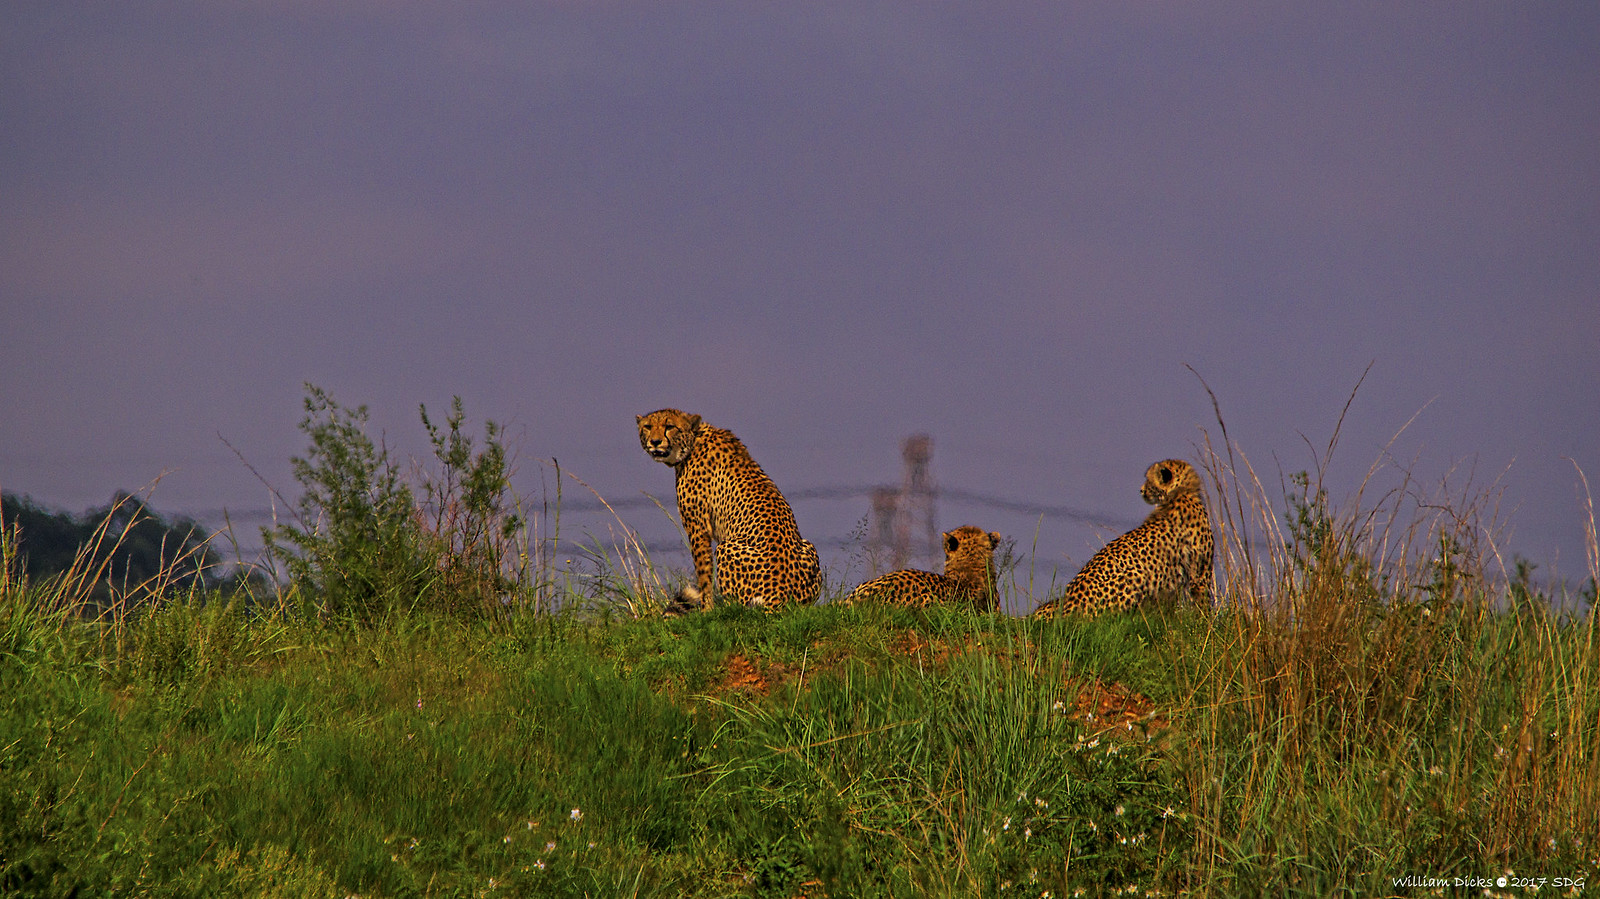
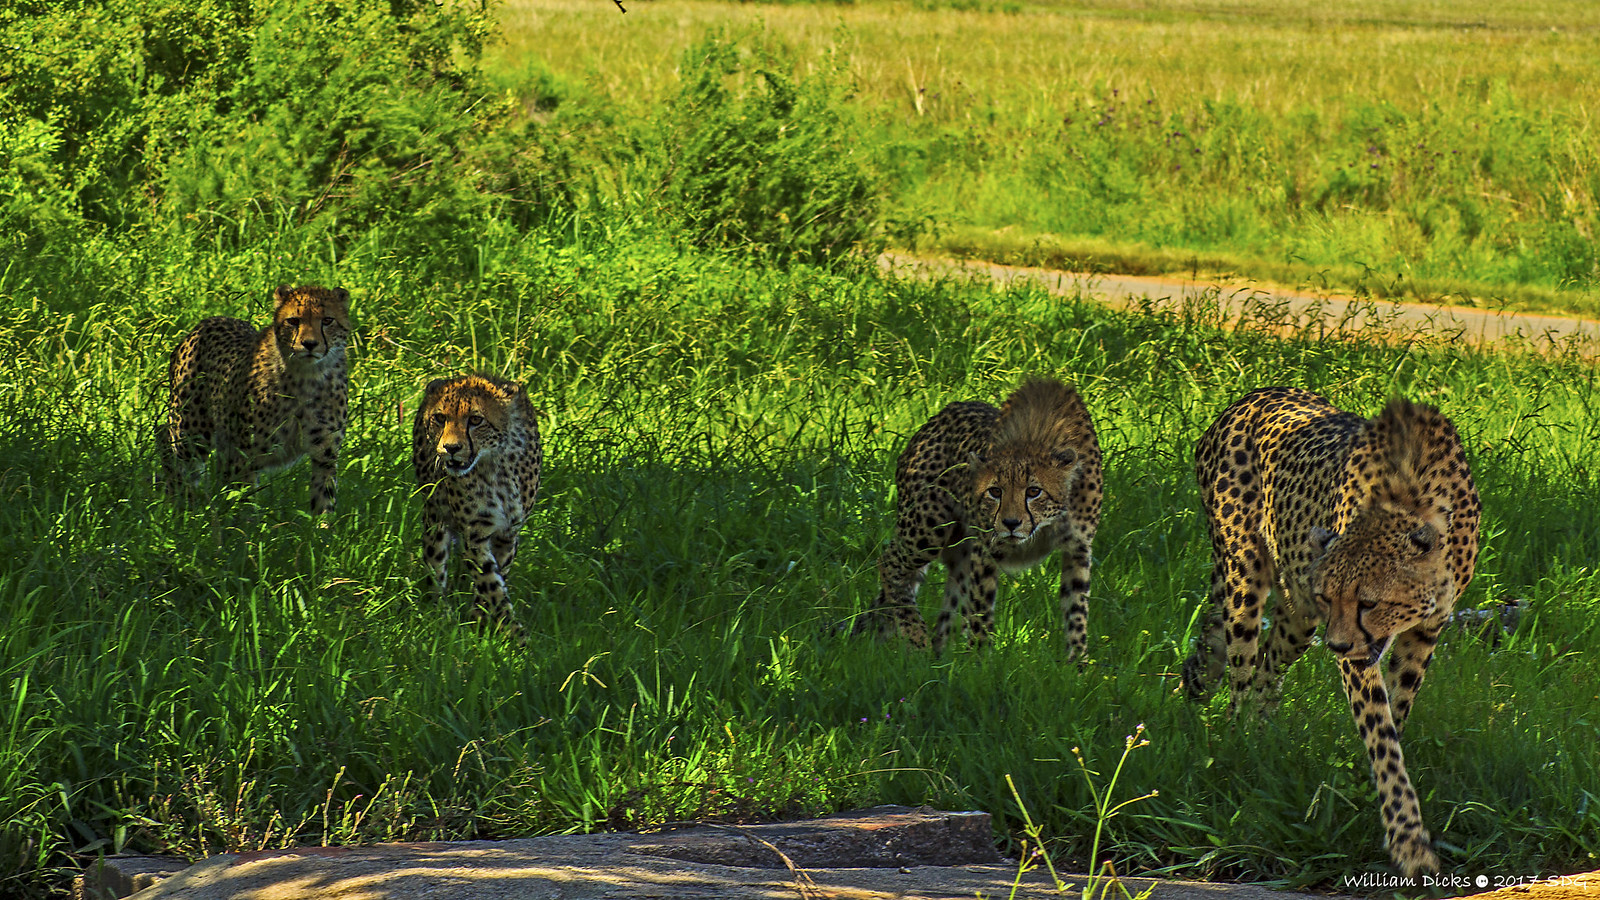
Cheetah mom and cubs (about 80m away)
Latitude: 25° 52.983'S, Longitude: 28° 17.646'E

I was on my way to the Otter Bridge (Latitude: 25° 52.888'S, Longitude: 28° 17.722'E) when I looked to my left, and on this mound I could see what I thought was a log. But, as I moved the log kept on changing shape, which is quite logical, since I kept changing the angle at which I saw this log. But then, the log seemed to look suspiciously like it had what to my poor eyesight, looked like cheetah ears. I stopped my car and took my Sony camera with a 150-500mm Sigma lens on it to see what I was looking at, and there it was; not just one cheetah, but FOUR! I moved my car around so that the driver’s window faced them, and settled in for the long haul. I stayed in that position for two and a half hours, until they all moved to the other side of the mound and I could no longer see them. I didn’t want to stay there in case they left on the other side while I waited this side for nothing. So, I decided to move on and then return this way a little later.

On my meanderings I came across dandelions—not a code word for fancy lions—and black wildebeest.
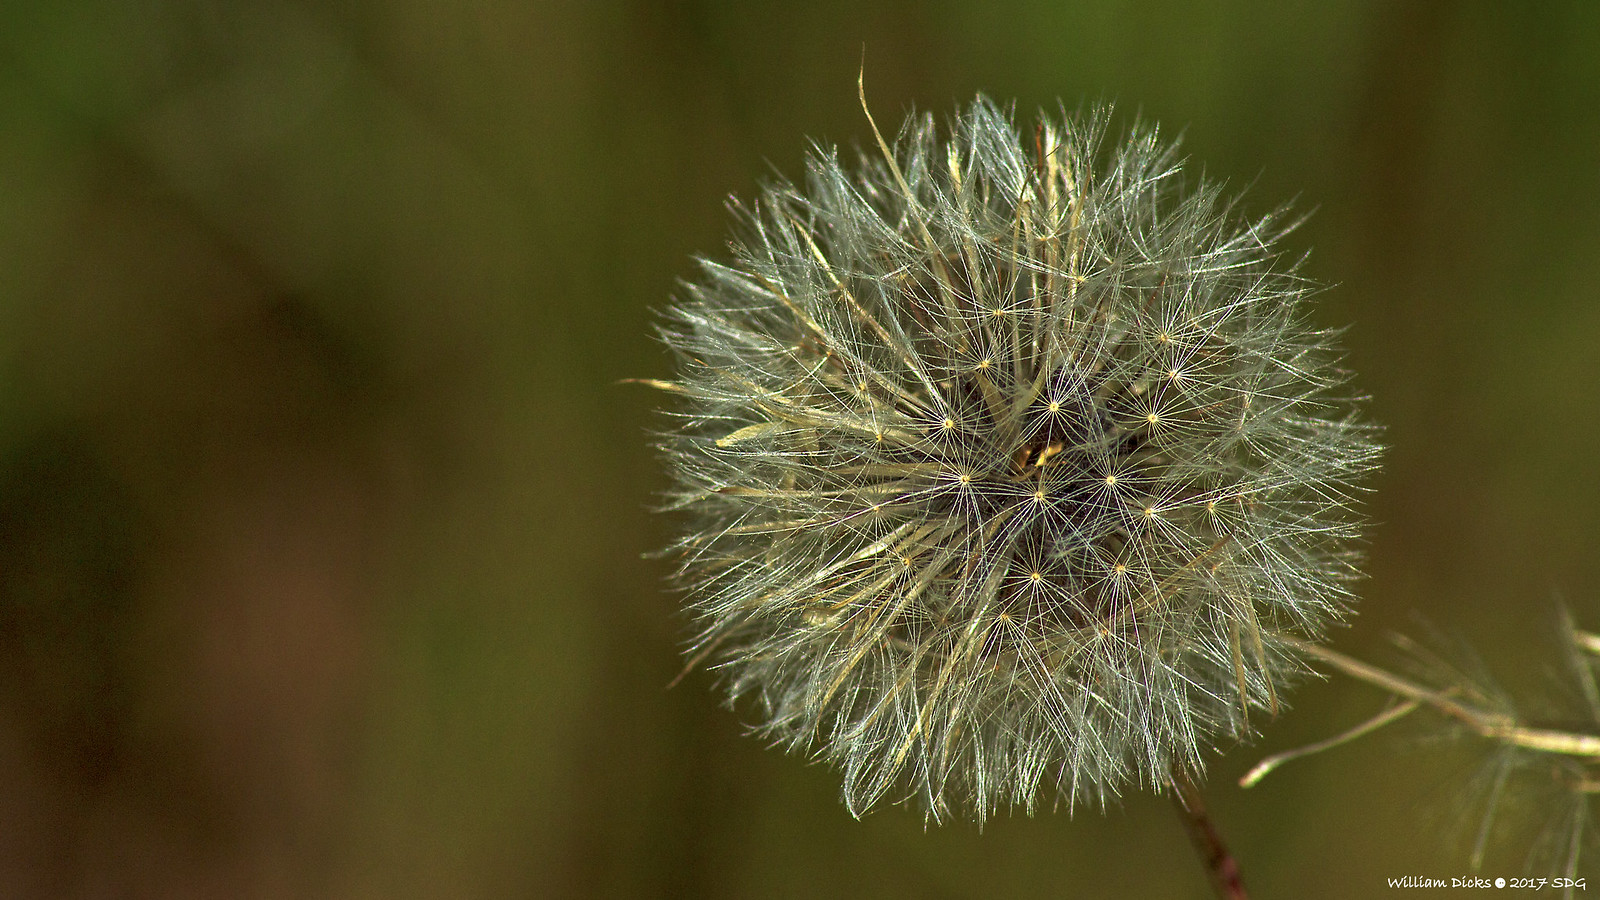
Dandelion
Dandelion

Black Wildebeest
Black Wildebeest

On my return to the Otter Bridge, approaching from the opposite end, the cheetahs were about to cross the bridge. I stopped in one of the parking spots with a good angle to see the cheetahs, and they certainly did not disappoint. They passed within feet of my car. What an amazing experience!

Cheetah mom and cubs
Mom and cubs about to cross the Otter Bridge!
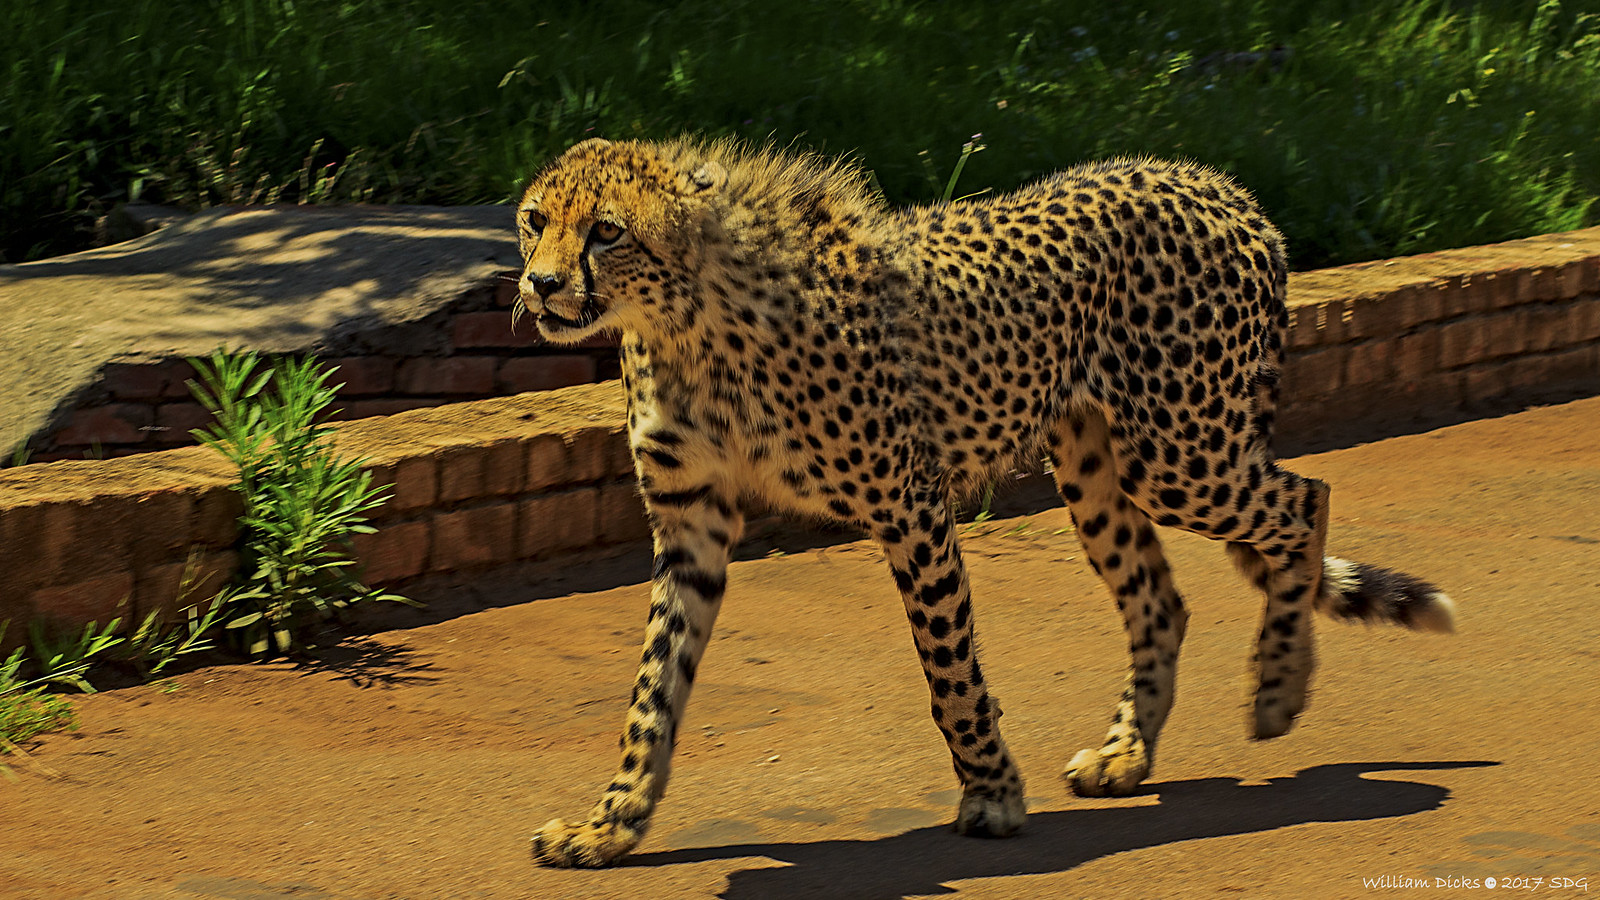
Cheetah cub
One of the cubs!

Cheetah mom and cubs
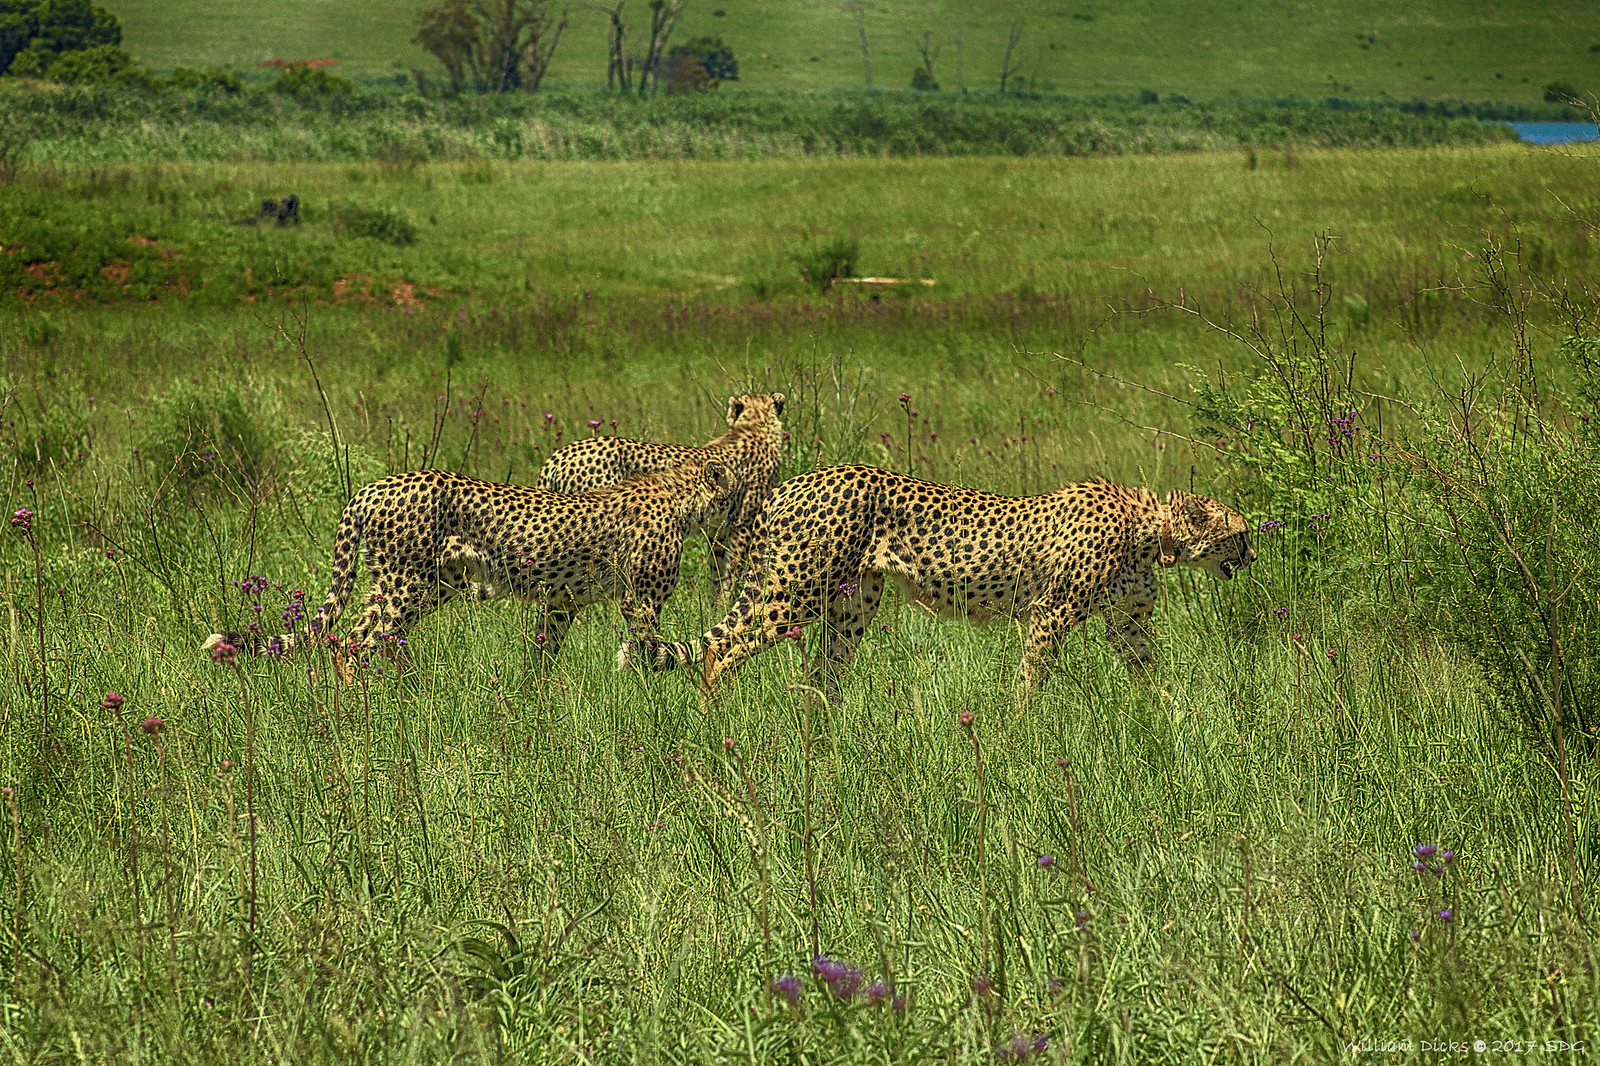
Mom and two of her cubs!

After getting this rare opportunity to be so close to them and to photograph them I decided that it was time to go home. My day had just become an amazing day!

To see more of my photographs, please visit my Flickr account!

Sunday, January 15, 2017

Not doing that much photography right now

About 9 or 10 weeks ago I woke up one day with severe pain in my right wrist. I thought that it was a temporary thing and didn’t bother with it doctorwhomuch. The pain became worse as time went by, and finally my wife made an appointment for me at our GP for 14 December 2016.

I visited the doctor—no, not the one/s on the right—and after he finished checking me out he said that I had acute tendinitis due to my work as a software developer which I’ve been since 1991. He gave me 2 injections into my wrist and told me that the pain should be gone in about 2 weeks. However, the pain never went away.

The pain became so severe that I found it difficult to turn a key in the door, or turn a door handle. The simplest every day activities caused pain in the wrist, and the most difficult for me to handle was the fact that it became unbearable to do my photography. I could take one or two photographs and then it would become necessary for me to nurse my wrist. The end result was that during the December holidays I only went out twice to take photographs compared to 6 times in December 2015.

So, on 6 January 2017 I saw the doctor again, and having learnt about the continuing pain, he referred me to a specialist doctor for sonars to be done on my wrist and hand. Before we entered the doctor’s offices I told my wife that I didn’t think that anything would be found and that it was probably just pains from getting older. The sonar was completed and the result is that I have arthritis in 3 fingers and in the wrist, plus I have the beginning stages of carpal tunnel syndrome and an internal ganglion cyst in my wrist, nd finally that I have fluid buildup in my fingers where there should be none.

I dropped off the detailed report at my doctor’s offices, and later that day he called me to tell me that he is referring me to an orthopedic surgeon and that his receptionist will call me with the appointment details. So, now I am waiting for that to see what happens next.

I know I haven’t been posting here much, but I have thought about posting, though. It’s the thought that counts, right? Here are a few photographs from a while back!

Playing with fire!
A little steel wool experimentation! – 12 Oct 2015

Playing with fire!
Some more! – 12 Oct 2015

Nature in Rietvlei Nature Reserve
There’s mushroom for all of us! at Rietvlei Nature Reserve - 1 Nov 2015

Nature in Rietvlei Nature Reserve
White-fronted bee-eater at Rietvlei Nature Reserve - 1 Nov 2015

Nature in Rietvlei Nature Reserve
The lonely road at Rietvlei Nature Reserve – 1 Nov 2015

You can get more of my photographs at Instagram, Twitter, 500px and Facebook!

Monday, July 4, 2016

Roodeplaat Nature Reserve - 10 October 2015

This past weekend I thought I'd write up another short post with photographs, just to find out that I hadn't done so since last year September; that was 10 months ago! I also realised that there were many sets of photographs that I hadn't processed yet. That set me on a quest to do processing on photographs that I took months ago.  


Last year in October I visited the Roodeplaat Nature Reserve (RNR), and although it isn't one of my favourite photographic spots, I did get a few photographs. When you visit RNR, you have to be VERY patient.

I arrived shortly after sunrise, and the light was a beautiful golden colour; indeed the golden hour!

Another watching zebra

The zebra above stared at me very intently, but it didn't seem like he was much bothered with my presence.

Indecisive kudu

Roodeplaat Nature Reserve

I came upon the Kudu above nibbling on the grasses. He looked at me for a short while, and then turned to his left and bolted out of there!

The rest of the photographs of this outing can be found here.

Monday, September 28, 2015

The Blood Moon and Photographic Mistakes

A couple of weeks ago I photographed the partial solar eclipse that was seen over South Africa, and that just made me more excited about the blood moon that was set to appear in the early hours of this morning over South Africa.

A friend of mine invited me over to his place, since he lives on a hill, and our view of the transformation of the moon wouldn’t be obstructed. So, last night I went to bed around 22:00 (10pm) and then woke up this morning at 02:30 (2:30am). I arrived at his place around 02:50 and then we set up in an open patch of grass next door to his house.

Early phase
Early phase of the moon’s transformation to becoming a blood moon.

Taking pictures of the early phases of the transformation to becoming the blood moon was easy. It was nailing the actual blood moon that gave me problems. I basically created these problems for myself due to not thinking clearly what I wanted to accomplish.

Halfway mark
Halfway through the transformation into the blood moon

The first problem I encountered was with my camera. Just to make clear, the camera isn’t the problem; it was my interpretation of what I saw on the LCD of the camera. I use a Sony SLT-A37, and for the price I paid for it, it is brilliant! I’ve had it now for 2 years and 8 months. I got this camera for free, since my insurance replaced my old Sony A200 after it was stolen. It was definitely a major upgrade to what I had. What I really like about the Sony cameras is that it makes use of an electronic viewfinder, which shows the photographer what the photo will look like before it is taken. That can be seen on the viewfinder and the LCD. However, that is the very thing that messed with my mind in the early hours this morning. When the moon was darkened, to get more light I started slowing down the shutter speed. But then, watching it on the LCD, it looked very grainy, but like one guy on Facebook said, even if he took grainy shots, he could still say that he did it. So, I took up the same philosophy. Yet, I started realizing that the photos I took of the blood moon didn’t have the grain in it like on the LCD (I didn’t feel like peeping through the viewfinder the whole night). They seemed ok. However, I had set the shutter speed down to somewhere between 6 and 10 seconds. Big.Mistake! When viewing it on the camera, it looked fine. However, when I got home I saw that they weren’t fine. So, what is usually very helpful, the electronic viewfinder (and LCD), in this case messed with my mind.

Blood Moon completed
When this photograph is enlarged, you can see a slight movement of the stars. Shutter speed 2 seconds.

The second problem was the fact that setting the shutter speed so slow actually picked up the movement of the moon and stars! Who knew that in 2-10 seconds there would be movement by these heavenly bodies?! I didn’t expect that, and so I never compensated for it. The right thing would have been to push the ISO higher in order to make use of a quicker shutter speed. But, that is how we live and learn.

The good thing is that I have 3 years to prepare for the next total lunar eclipse that will be seen over South Africa. Maybe I will be better prepared then?

Blood Moon accomplished
Here the stars actually make a long line of movement. Shutter speed 5 seconds.

Both of the blood moon photographs are blurred due to the long exposure, and you can see the stars making trails. Next time I will know better!

Saturday, September 19, 2015

Close up photography experimentation

A couple of nights ago I was experimenting a bit with close up photography, but without just taking a photograph from close up. The rules of my experiment was that I was not allowed to manipulate the photograph in post-processing—Photoshop—apart from sharpening, contrast and saturation. So, no special effects were to be added! The following photo is the result of this fun and games exercise.

Close up Experimentation
 marbles_in_water_settings

When I started off with this, all I knew was that I wanted water, a mirror in the water and candles for lighting, and something to take photos of in this setup. My wife offered me a rose shaped, creamy coloured candle as my subject. It was simply too bland. Then she hauled out a bunch of marbles of different colours: gold, green, blue, transparent, etc.

I first tried with the gold marbles, but they came out too uni-coloured with the flame colour of the candles. Then I started playing around with the different marbles and moved the lighting candles around for the best position.

Nothing really gave me that sparkle that I needed, and then it hit me! So far, the water was not moving and the marbles were on top of the mirror, but they were just… there! I needed to make the water move while I played around with a slow shutter speed.

So, how did I do it?

Here are the tools I used to accomplish this:

  • Deep cooking tray
  • Mirror
  • Water to cover the mirror
  • 3 candles for lighting
  • 2 teaspoons
  • A wife
  • Camera

I set up the cooking tray close to the edge of the kitchen counter. I know! I know! But, you can do more than just cooking in the kitchen! I put a large square mirror at the bottom of the cooking tray, and then added enough water to cover the mirror. The water almost covered the bottom layer of marbles completely. Next, I arranged the marbles in the centre of the mirror. I positioned two of the candles on the front corners of the tray closest to the camera. I positioned the third candle exactly opposite the camera, but so that the flame reflection was actually under the marbles where the camera couldn’t see it directly. I made no use of main lights for this experiment. Without the candle light it would essentially be dark. My camera’s settings were set as the graph shows below the photo above: shutter speed – 2s, ISO 200, aperture – f10. My wife stood on the right with a teaspoon and I was on the left with a teaspoon. I set the camera on a 2 second delay before it took the photograph. In these 2 seconds before the shutter release, both my wife and I started stirring the water back and forth and kept it going until the photo was finally captured. The camera was angled somewhere between 45° and 60° relative to the marbles.

The continual movement of the water over the two seconds that the shutter was open, caused amazing light refraction patterns. Some of the patterns are soft, smoky looking while others look like small lightning bolts which can be seen on the green and blue marbles on the right of the photograph.

Experimentation in photography can produce surprising results! Sometimes it can produce satisfying results and at other times disappointing results. I think this photograph came out quite satisfying. I just need to do some more experimentation to perfect the image.

Sunday, September 13, 2015

Partial Solar Eclipse and CNN

There was a partial solar eclipse over Southern Africa, Antarctica and part of the southern Atlantic and Indian Oceans today. Many people did not know about it, but luckily I did. It started this morning between 06:40 and 06:45, and I made myself home in the Coots Corner Bird Hide at Rietvlei Nature Reserve, since it is the perfect vantage point from which to watch the sunrise. I sat there for approximately one hour and forty minutes. I took a total of 33 photographs from the start of the eclipse to the end.

I started to tweet on my Twitter account about the eclipse and I then started getting a lot of notifications of retweets and favorites! At the time of taking the photos I wasn’t able to upload any photos to Twitter or Facebook, etc; so, I improvised and snapped a photo of the LCD screen while the camera was aiming at the sun, using my Sony XPeria Z3 Compact. I immediately tweeted the photo onto my Twitter account.

partialsolareclipsemycamera
Used my mobile to take a photo of the back of my camera in order to tweet it.

I received a lot of activity on this photo on my Twitter page. Out of the blue I received a request from Derek van Dam, meteorologist at CNN and CNN International, via his Twitter account, whether he could use this image on his next weather section on CNN. I gave the go-ahead, but I couldn’t see it, so I quickly called my wife to switch the TV on to watch it. She was in time to see it on CNN and that looked like this:

partialsolareclipsemycameracnn
My photo from above on CNN! Yay! I’m famous!

It was really cool to see the image of my photo on CNN, later on Twitter. Funny how things happen sometimes. And it can’t even be called a real photograph!

Anyway, I took some of the photographs of the eclipse and created an image with a series of the eclipse from beginning to end.

Partial Solar Eclipse
 

The settings of my camera changed from the beginning to the end as the sun became consistently brighter. See the photos below. Please note that I pulled the info below each photograph below from my Flickr account.

Partial Solar Eclipse
 01 - D20150913T064752_WGD_S_tn_settings

Partial Solar Eclipse
D20150913T065331_WGD_S_settings 

Partial Solar Eclipse
 D20150913T065547_WGD_S_settings

Partial Solar Eclipse
 D20150913T070108_WGD_S_settings

Partial Solar Eclipse
 D20150913T070751_WGD_S_settings

Partial Solar Eclipse
 D20150913T071410_WGD_S_settings

Partial Solar Eclipse
 D20150913T072035_WGD_S_settings

Partial Solar Eclipse
 D20150913T072838_WGD_S_settings

Partial Solar Eclipse
 D20150913T073825_WGD_S_settings

Partial Solar Eclipse
 D20150913T074428_WGD_S_settings

By the time of the photo above, the sun was sitting fairly high and it was very bright. I could no longer get a defined outline of the sun because of the brightness! I felt a little stuck at this point, and so my mind went into overdrive! I have the Sony SLT-A37 with the big lens on it, but I do not have an ND filter for it. However, my Canon D1200, which I use for close ups and landscapes using a small lens, has an ND400 filter, but it won’t fit my big lens. So, I had to improvise! For the next four photographs of the sun, of which three can be found below, I simply aimed at the sun while holding the smaller ND400 filter in front of the big lens, and it worked!

Partial Solar Eclipse
 D20150913T075331_WGD_S_settings

Partial Solar Eclipse
D20150913T075948_WGD_S_settings 

Partial Solar Eclipse
 D20150913T081825_WGD_S_settings

And so another day, another weekend comes to an end! Now we have to wait for the next eclipse, which will be a total lunar eclipse on 27/28 September 2015. For South Africans, you will have to be awake in the very early hours of the morning on Monday, 28 September 2015 at 02:11. The total eclipse will start at 04:11, maximum eclipse will be at 04:47 and the full eclipse will end at 05:23.

For more of my photos, visit my Flickr account.